4 minutes
RaspberryPi – Stratum 1 - NTP server
I’ve been following Jeff Gerling’s videos on “nanosecond clock sync”, which got me looking into stratum 1 NTP servers. This was a fun little project i’ve wanted to do for a while now, and am glad i’ve finally got around to it. I want to share this with you guys as well. Worth mentioning that this works with a Raspberry Pi5’s just as well. Also, shoutout to Tom and Rodrigo from which i’ve put together this guide: https://blog.tomvoboril.com/, https://www.youtube.com/@linuxtechschool4841
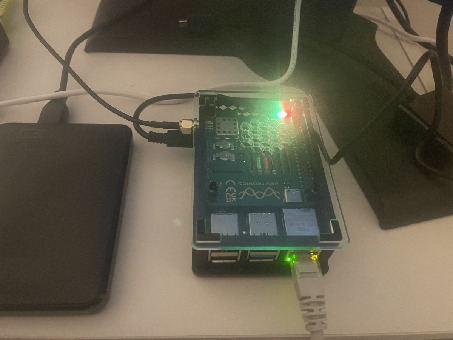
Here are the links to all bits of hardware I have used followed by the setup:
Raspberry Pi GPS HAT with RTC - https://thepihut.com/products/raspberry-pi-gps-hat
GPS Antenna - https://www.amazon.co.uk/dp/B08NK887DV
Raspberry Pi4 1GB - https://thepihut.com/products/raspberry-pi-4-model-b
Raspberry Pi4 USB-C Power Supply UK - https://www.amazon.co.uk/dp/B07VKF1CK8
GPS HAT CASE for Raspberry Pi4 (v2.0) - https://thepihut.com/products/gps-hat-case-for-raspberry-pi-4
ssh ntp01 –> paul@ntp01:~ $
We’ll start by elevating privileges:
sudo -i
First off some tweaks raspi-config:
raspi-config
Select "Interface Options"

And enable "I2C"

Now let’s install python-smbus and i2c-tools:
apt-get install python3-smbus python3-gps python3-serial i2c-tools pps-tools -y
We will test it out:
i2cdetect -y 1
Here we can see the RTC (0x52) and GPS (0x42) on the I2C bus.
0 1 2 3 4 5 6 7 8 9 a b c d e f
00: -- -- -- -- -- -- -- -- -- -- -- -- --
10: -- -- -- -- -- -- -- -- -- -- -- -- -- -- -- --
20: -- -- -- -- -- -- -- -- -- -- -- -- -- -- -- --
30: -- -- -- -- -- -- -- -- -- -- -- -- -- -- -- --
40: -- -- 42 -- -- -- -- -- -- -- -- -- -- -- -- --
50: -- -- 52 -- -- -- -- -- -- -- -- -- -- -- -- --
60: -- -- -- -- -- -- -- -- -- -- -- -- -- -- -- --
70: -- -- -- -- -- -- -- --
Add dtoverlay=i2c-rtc,rv3028, dtoverlay=pps-gpio,enable_uart=1, and lets disable bluetooth as well:
cat << EOF | tee -a /boot/firmware/config.txt
dtoverlay=i2c-rtc,rv3028
dtoverlay=pps-gpio
dtoverlay=disable-bt
enable_uart=1
EOF
Now let’s restart the pi:
reboot
On reboot rerun the i2cdetect line and you should see 52 has been replaced with UU to indicate the
kernel driver is loaded.
Next we remove and disable fake-hwclock:
apt-get -y remove fake-hwclock
update-rc.d -f fake-hwclock remove
systemctl disable fake-hwclock
Remove entries from system files:
vim /lib/udev/hwclock-set
And we comment out the following lines:
#if [ -e /run/systemd/system ] ; then
#    exit 0
#fi

#/sbin/hwclock --rtc=$dev --systz
#/sbin/hwclock --rtc=$dev --hctosys
To read time:
hwclock -v -r
To write time:
hwclock -w
GPS/PPS Operation
First let’s install pps-tools:
apt-get install pps-tools
Add dtoverlay=pps-gpio to /boot/firmware/config.txt:
cat << EOF | tee -a /boot/firmware/config.txt
dtoverlay=pps-gpio
EOF
Add pps-gpio to /etc/modules:
cat << EOF | tee -a /etc/modules
pps-gpio
EOF
Reboot and test the config:
reboot
ppstest /dev/pps0
Configure NTP with chrony:
First let’s install prerequisites:
apt-get install gpsd chrony -y
We will enable the serial ports from raspi-config:
raspi-config
And we follow Interface Options,

And Serial Port, once prompted for a login shell to be accessible over serial tap No
Second prompt Would you like the serial port hardware to be enabled - >> "Yes"
This will enable the serial port and pass the pps.

Let’s get the serial device [entry will be easy to recognise]:
ls -la /dev/
Device in my case:

To verify the operation of the GPS via serial:
apt-get install minicom
minicom -b 115200 -o -D /dev/ttyAMA0
Configure gpsd:
vim /etc/default/gpsd
In the first block:
DEVICES="/dev/ttyAMA0 /dev/pps0"
START_DAEMON="true"
Second block - options to pass to gpsd:
GPSD_OPTIONS="-b -n -D3 -s 115200"
For the third block we will disable USB GPS hot plug:
USBAUTO="false"
This is how the config file should look like:

Next we will add makestep, PPS, and NMEA and allow all traffic from local networks RFC1918:
cat << EOF | tee -a /etc/chrony/chrony.conf
makestep .1 5
refclock PPS /dev/pps0 refid PPS prefer
refclock SHM 0 refid NMEA

allow 192.168.0.0/16
allow 172.16.0.0/12
allow 10.0.0.0/8
EOF
Restart the system:
reboot
Troubleshooting tools.
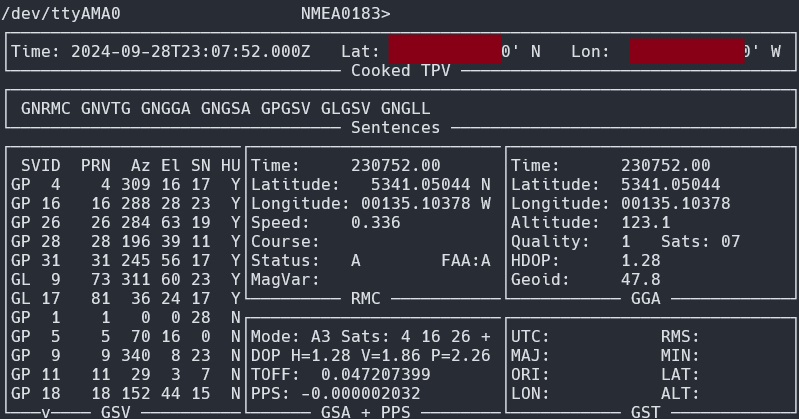
gpsmon is a great little tool that shows the incoming data on the GPS receiver:
gpsmon -n

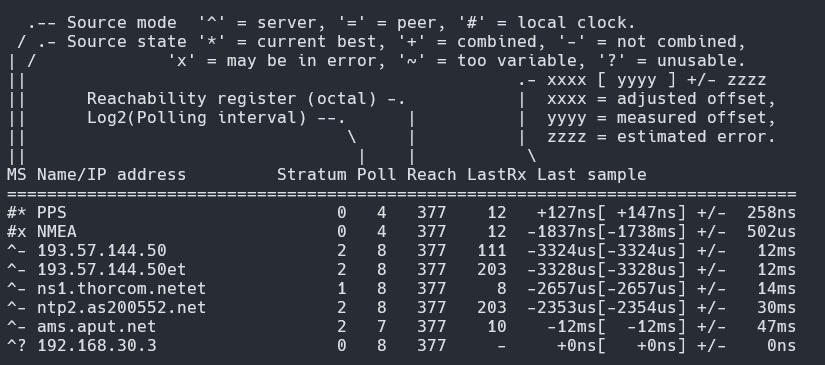
chronyc will show sources and make comparison to other NTP servers on the internet:
watch -n 1 chronyc sources -v

timedatectl will show all time standards used on the local server:
timedatectl

tcpdump is also useful in telling us which clients are actually using the NTP server by running:
tcpdump -Qin -ni any port 123
The makestep option on chronyc will force the hardware to sync immediately:
chronyc makestep
Our NTP server is done! :)
