4 minutes
Debian – Gitlab server install
A very Merry Christmas to everyone! Blog was down for relocation and maintenance. Feels like it is long overdue for some new content. I have started using gitlab / github.com more and more by the day passing. Fantastic tools to keep track of you work and collaborate projects.
For this guide on how to install a gitlab instance, i’ve prepared a VM with the following specs:
4 CPU cores 4 GB of RAM 50GB disk space [depending on the usage of the server please consult https://docs.gitlab.com/ee/install/requirements.html#hardware-requirements ]
As a test machine for this demo I went with a Debian 12 Bookworm VM, and kept in line with the above specs.
I have tried to install on a Debian Trixie VM but the package manager is unable to find gitlab-ce once repositories are set up.
Once the VM is ready and powered on, we need to update and upgrade the system(mine was already up to date being a cloud-init template).
sudo apt update && sudo apt ugprade -y
Now with the system updated let’s move on and install dependencies:
sudo apt install ca-certificates curl openssh-server postfix tzdata perl
Note: postfix will ask for an initial configuration where we will select “Internet Site”, and on the next screen enter your server’s domain name or IP address.

I like to run things as root, just because I am lazy, you get extra style points for running everything from a simple user with sudo access ;)
Now let’s download the installation script from gitlab.com website:
cd /tmp
curl -LO https://packages.gitlab.com/install/repositories/gitlab/gitlab-ce/script.deb.sh

Let’s prepare the hosts to install the necessary packages:
sudo bash script.deb.bsh
After script has checked the VM, we may proceed to install gitlab-ce:
sudo apt install gitlab-ce
Post install the server needs reconfiguring and will be accessible only locally
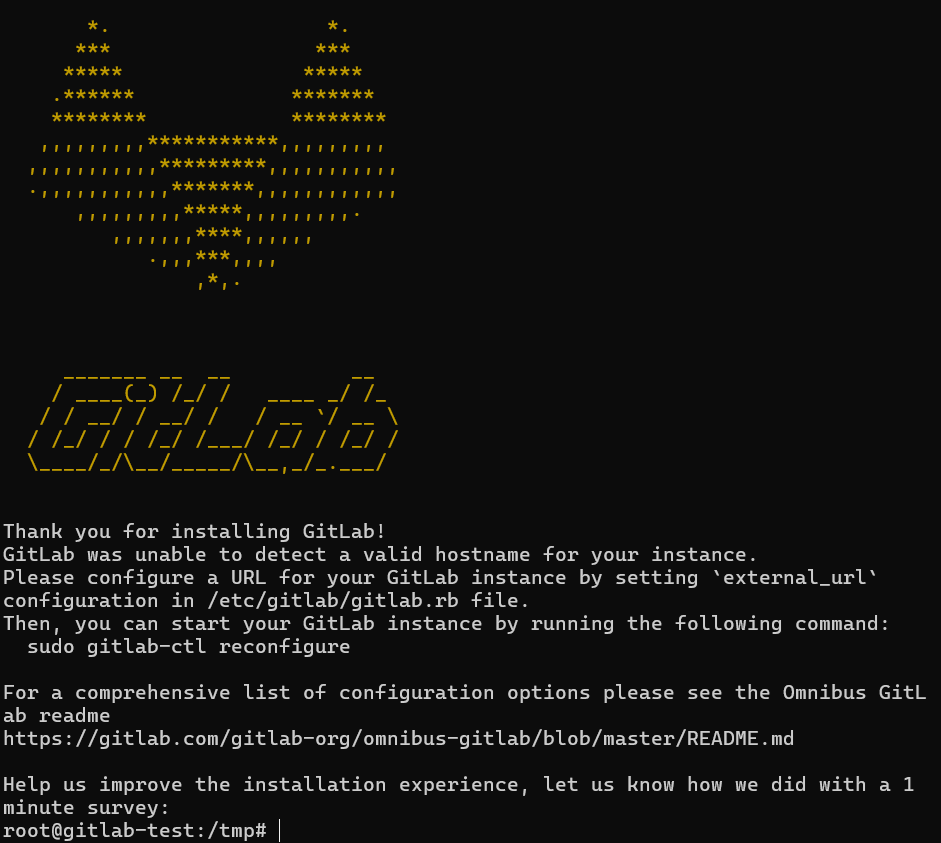
With the package installed, let’s change the ’external_url’ in /etc/gitlab/gitlab.rb:
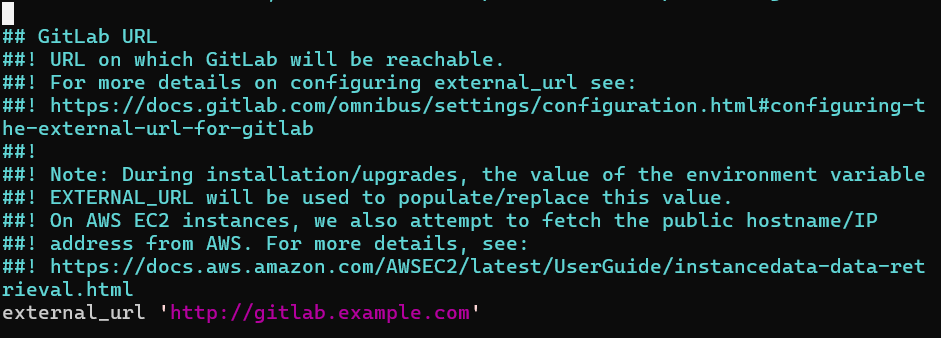
Change to what suits you like http://IP.of.the.instance, I have a domain controller so will be something like http://gitlab.domain.local.
Finally let’s reconfigure the server to point at the URL:
sudo gitlab-ctl reconfigure
With the reconfig now done, let’s retrieve the password and change it:
sudo cat /etc/gitlab/initial_root_password

Once we log in with the intial password set above let’s proceed with some small tweaks. First thing that I like to do is go for dark themes all over the place.
- so from profile picture in top left hand side select “Preferences”:
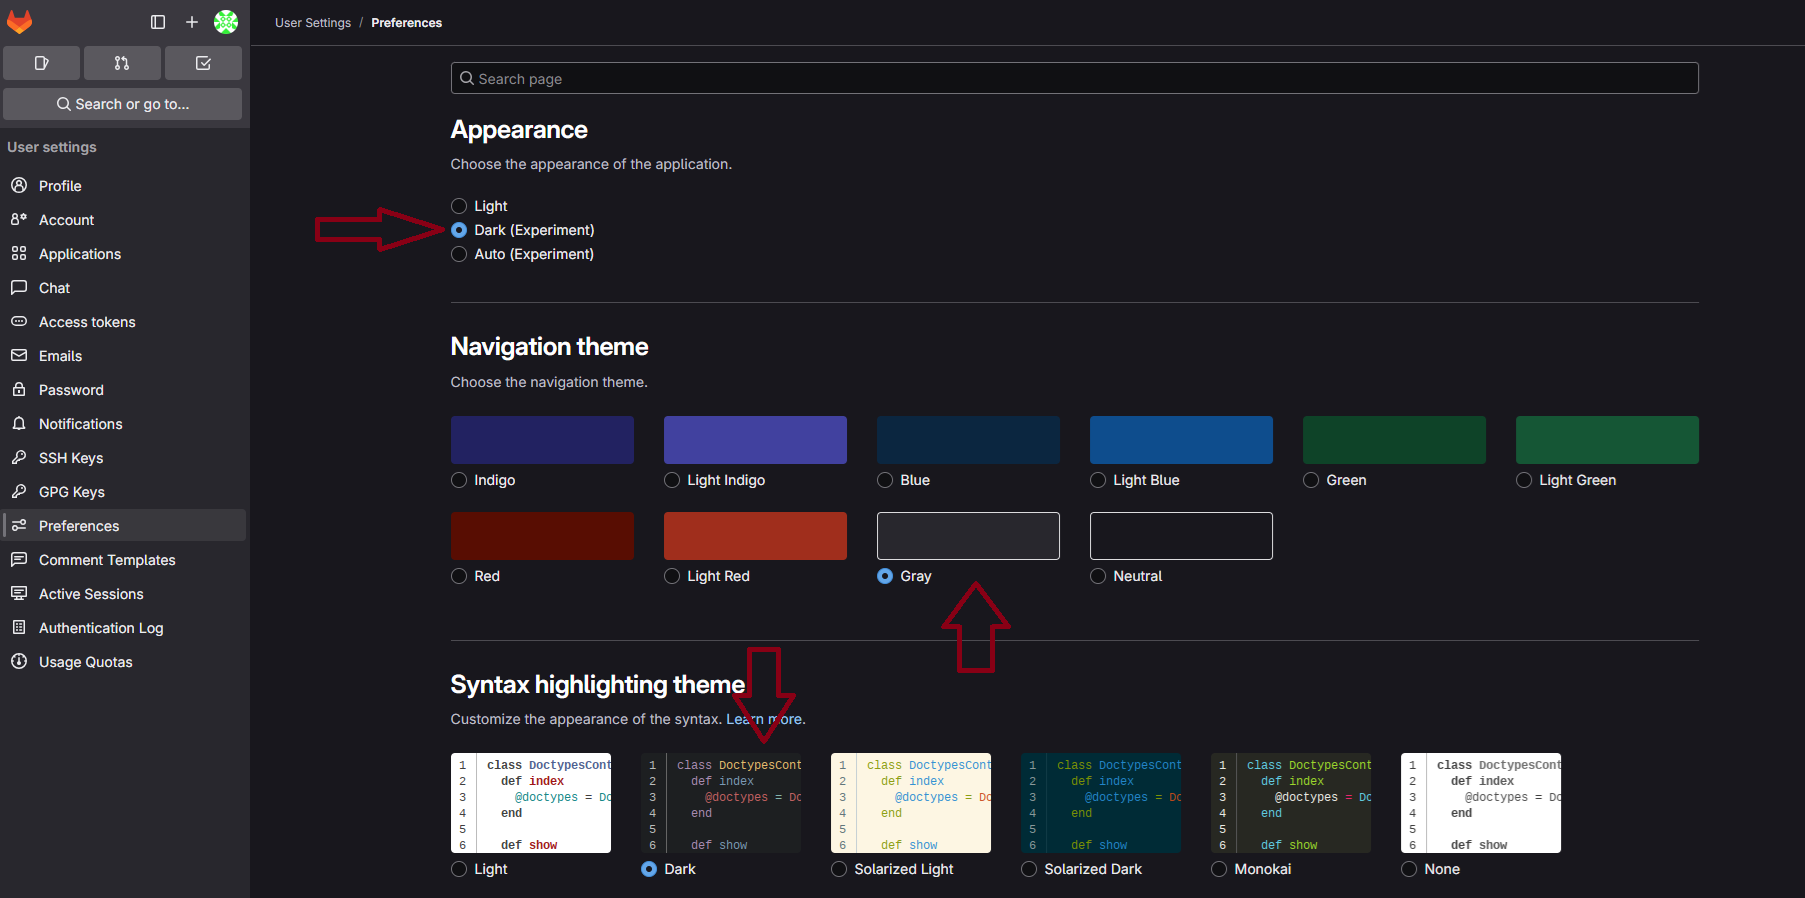
Next let’s disable user registrations even if the server is not internet facing to get rid of annoying messages:
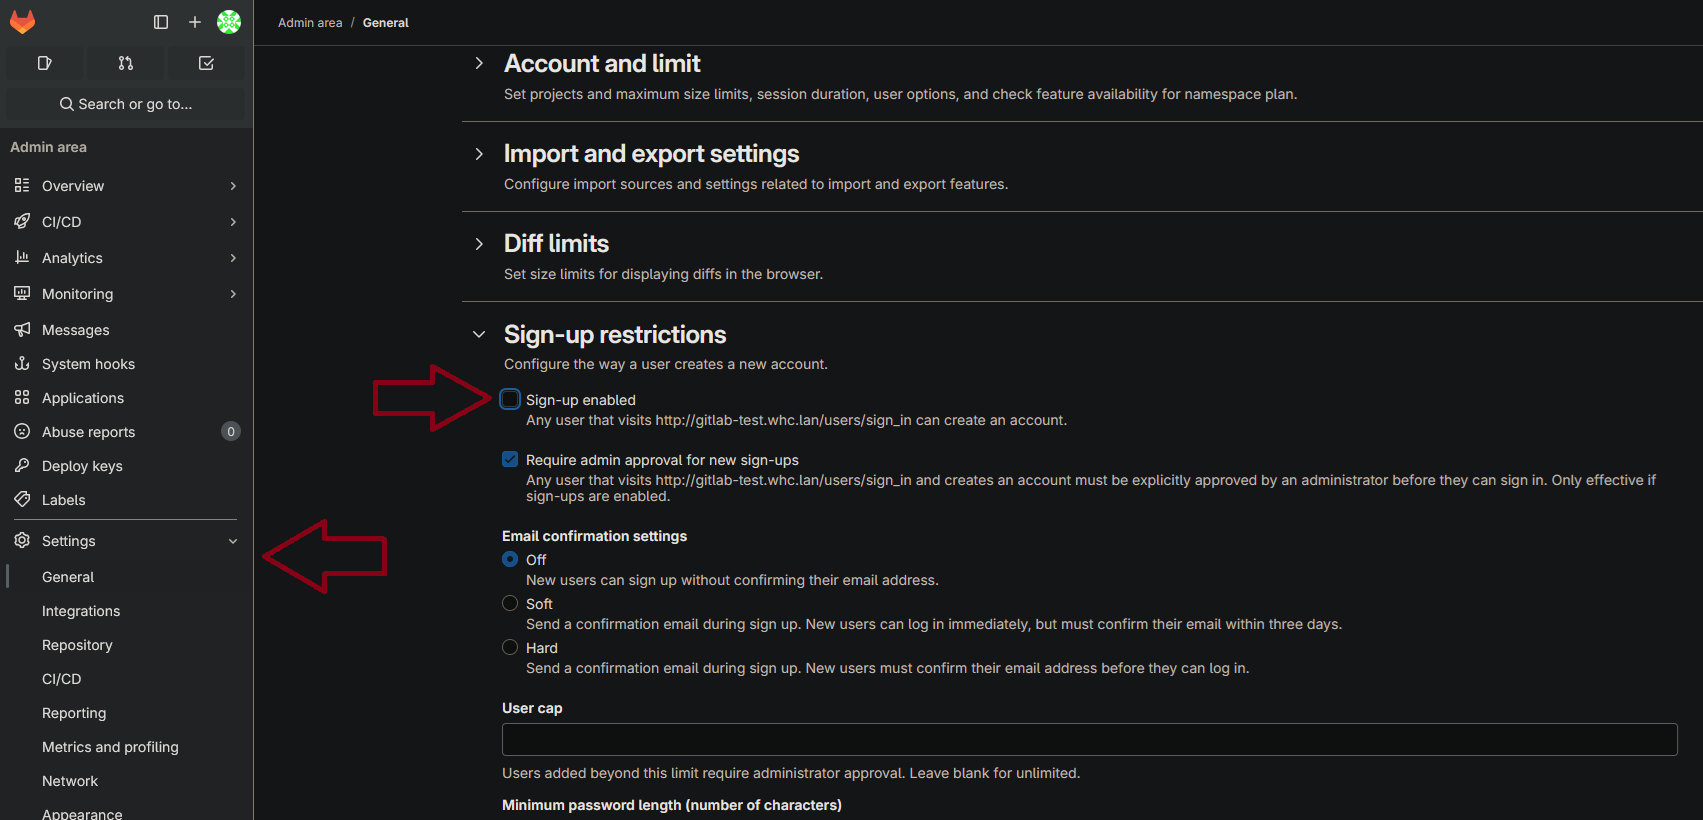
In the same section as per above, once disabled make sure to save your changes.
Let’s change the password since it will expire in 24 hours from initial installation.
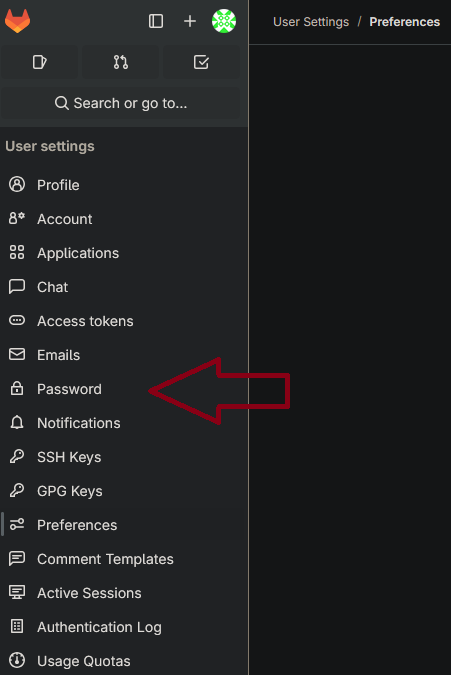
- from top left hand side again click on profile picture, Preferences and click on Password
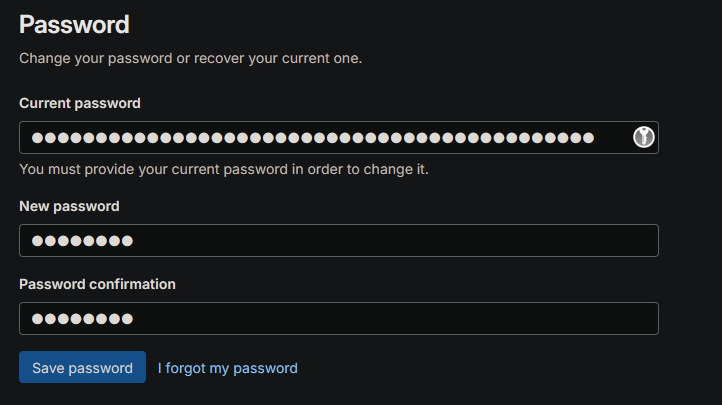
I’ve opted for a simple password since my instance is only local, I highly encourage that you use a password generator and have a password of at least 20 random characters.
Now with that out of the way the last step is to add an SSH key to our instance
- first lets create a quick ssh key:

I am not going to dive in too much detail on how to generate ssh keys, as that will be the next guide on the blog. If you want to learn more about that stay tuned! :)
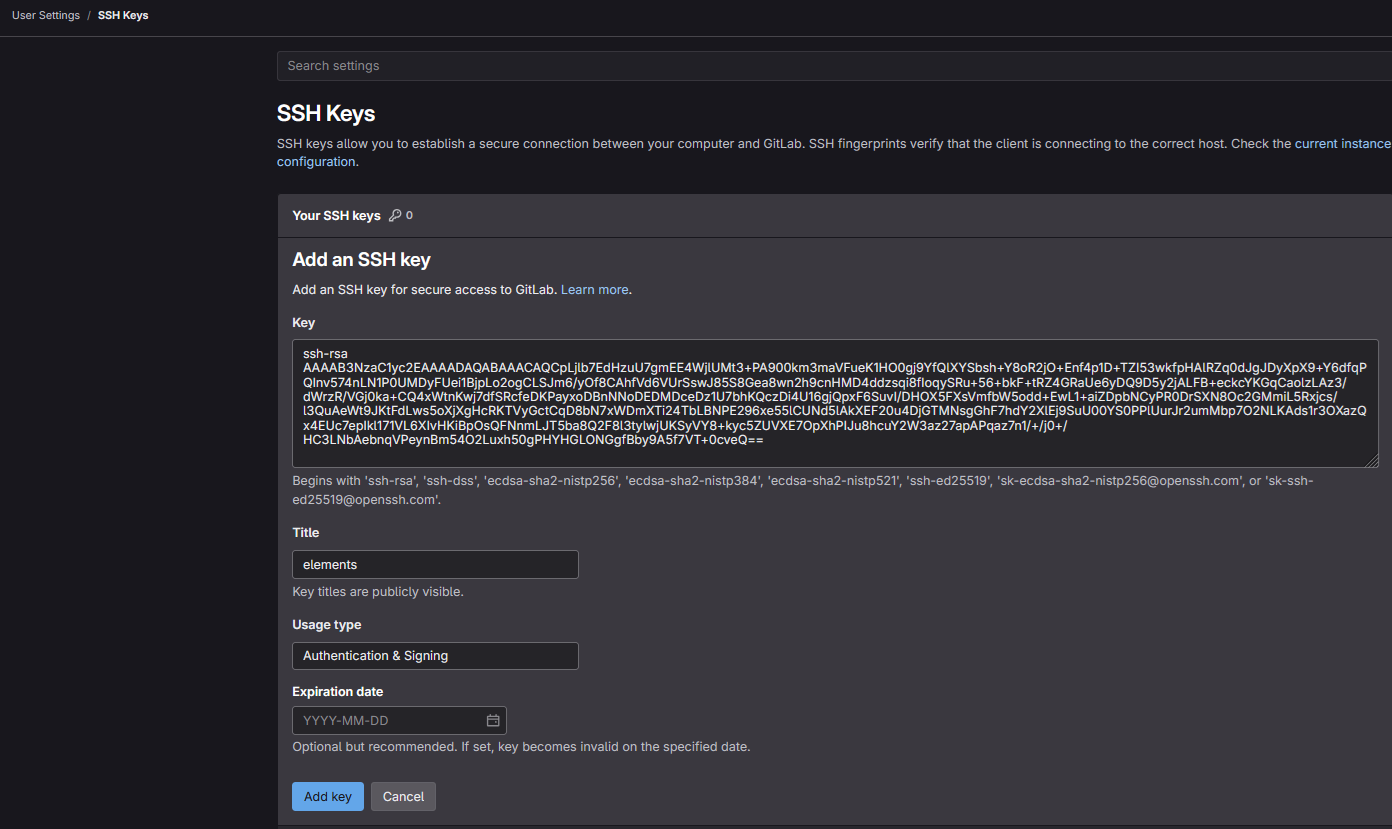
- now we add the key to the instance, again Profile -> Preferences and SSH Keys:
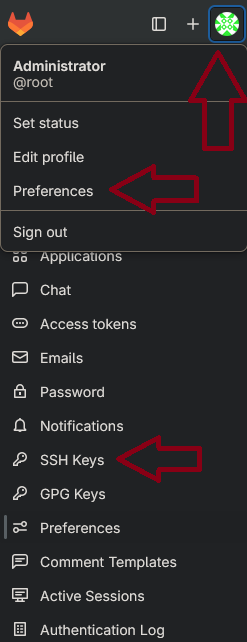
- click on Add new key
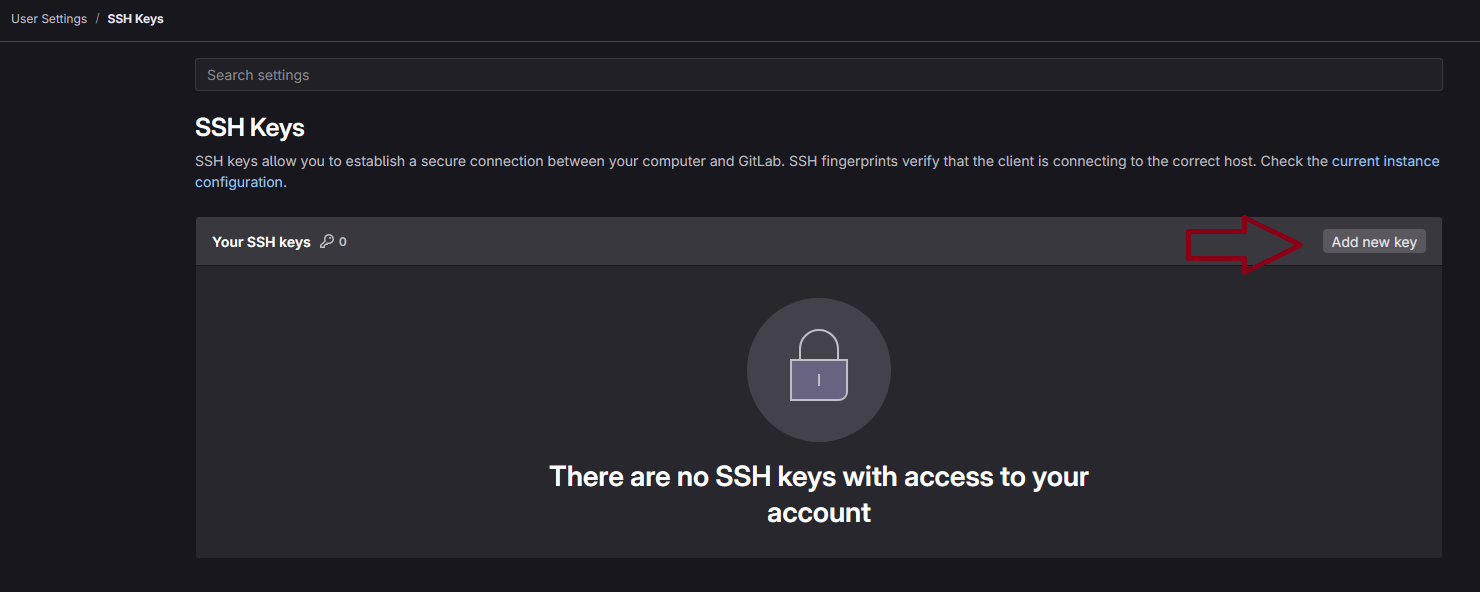
- and finally paste the public key, give it a name to distinguish from your other keys, also as a good practice would be to rotate keys at least once a year:
And that is how I set up a self-hosted gitlab instance in a few easy steps. It really requires a few hours to get used to navigating around the server, once done you’ll surely move your code to your new instance. Happy coding!
Enjoy :)